A field is a container
A field holds text the user can read and, unless you lock it, edit: in Run mode, click into a field and type. In a script a field works like a variable: you put into it, put after it, read it, and use every chunk expression you know on it.
- On a new card, drag a Field, make it wide, and name it
Notes.
put "one two three" into field "Notes"
put the number of words of field "Notes"
put "TWO" into word 2 of field "Notes"
put " four" after field "Notes"
put field "Notes"3 one TWO three four
A field holding a number can be used in sums, and changed in place:
- On a new card, drag a Field and name it
Score. In Run mode, click into it and type10. - Drag a Standard Button beside it and name it
Add 5.
on mouseUp
   add 5 to field "Score"
   put field "Score" * 2
end mouseUp30 40
The field says 15 after the first click and 20 after the second, and the Message Box shows twice that.
Styling part of the text
Every text property can be set for a chunk of a field, not just the whole field: a word in bold, a line in another colour, a few characters bigger. By hand, select the text in Run mode and choose from the Text menu: Text > Bold, Text > Size, Text > Color. A script names the chunk. A field gives every line the same height unless its fixedLineHeight (the Inspector's Fixed line height, in Text) is false, so turn that off when some lines are bigger than others.
- On a new card, drag a Field, make it big, and name it
Poem. In the Property Inspector's Text section, turn off Fixed line height. - In Run mode, type three lines into it:
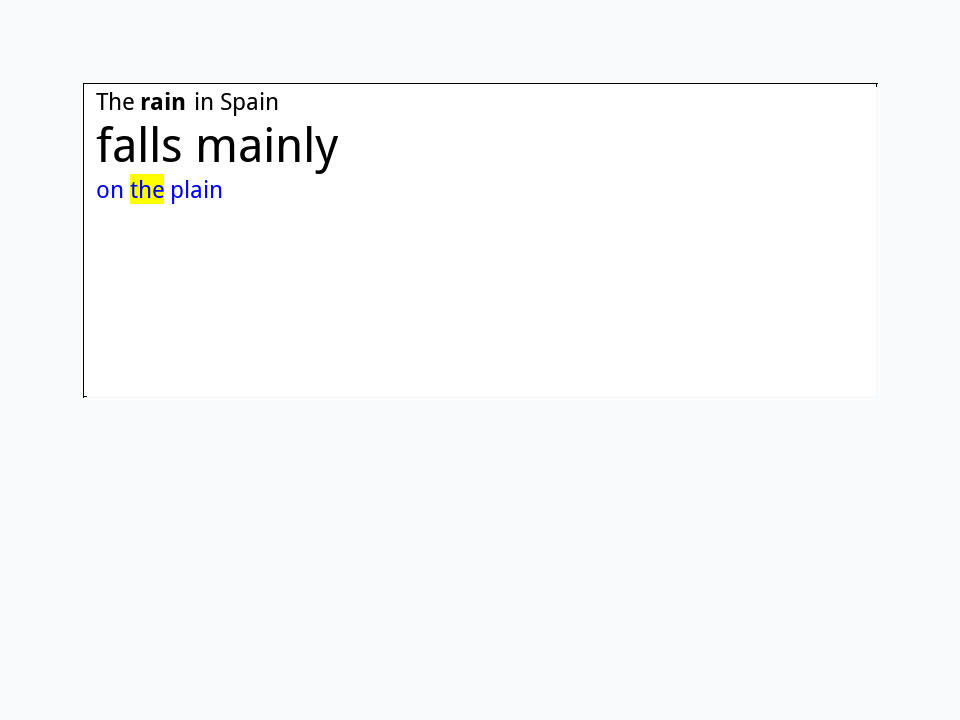
The rain in Spain,falls mainly,on the plain.
set the textStyle of word 2 of line 1 of field "Poem" to "bold"
set the textSize of line 2 of field "Poem" to 24
set the textColor of line 3 of field "Poem" to "blue"
set the backgroundColor of word 2 of line 3 of field "Poem" to "yellow"
put the textStyle of word 2 of line 1 of field "Poem"bold
Text with its styles: htmlText
the text of a field is its plain characters. the htmlText is the same text with its styles, in a small dialect of HTML. You can read it to save a field's look, and set it to fill a field with styled text in one go.
- On a new card, drag a Field, make it wide, name it
Styled, and set its Text size to 18. - In Run mode, type
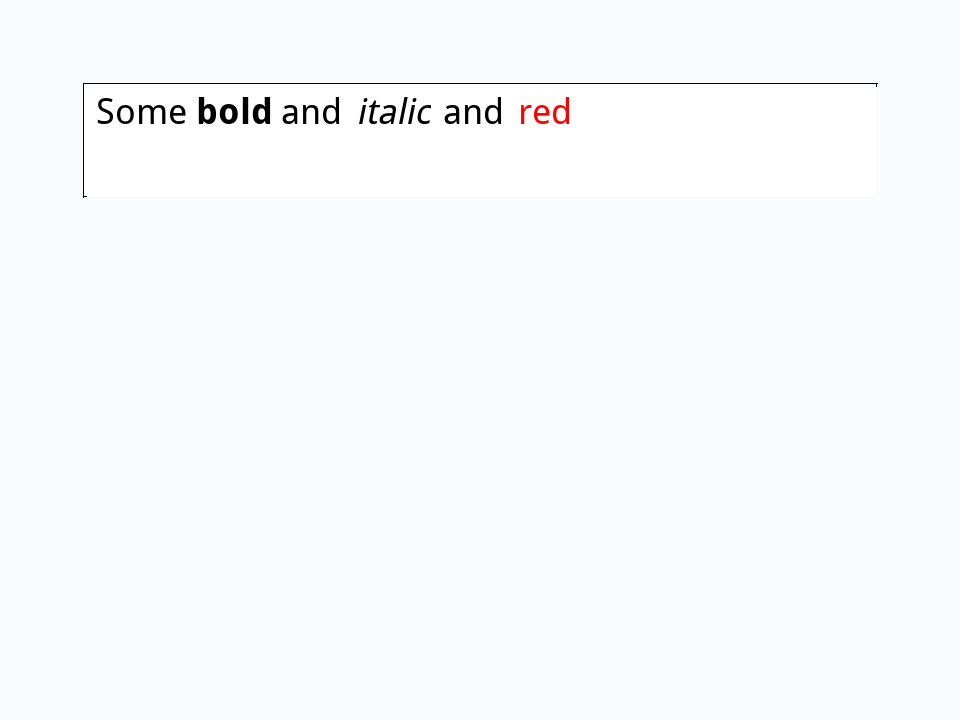
Some bold and italic and red. Double-click the wordboldand choose Text > Bold, the worditalicand choose Text > Italic, and the wordredand choose Text > Color > Red.
put the text of field "Styled"
put the htmlText of field "Styled"Some bold and italic and red <p>Some <b>bold</b> and <i>italic</i> and <font color="#FF0000">red</font></p>
Label fields
Most text you see in a program that the user cannot change, titles, captions, a score, is a field with its border and background turned off and its text locked. The Tools palette has one ready made: the Label Field.
- On a new card, drag a Label Field to the top, make it wide, and name it
Title. In the Property Inspector's Text section set its Text size to 30, its Text style to bold and its Text align to left, and in Contents replaceLabel:withWeekly report. - Drag a second Label Field under it, name it
Caption, align it left, set its Text color (in Colors) to a slate grey, and make its contentsEverything sold this week, by day.
put the lockText of field "Title"
put the showBorder of field "Title"
put the opaque of field "Title"true false false
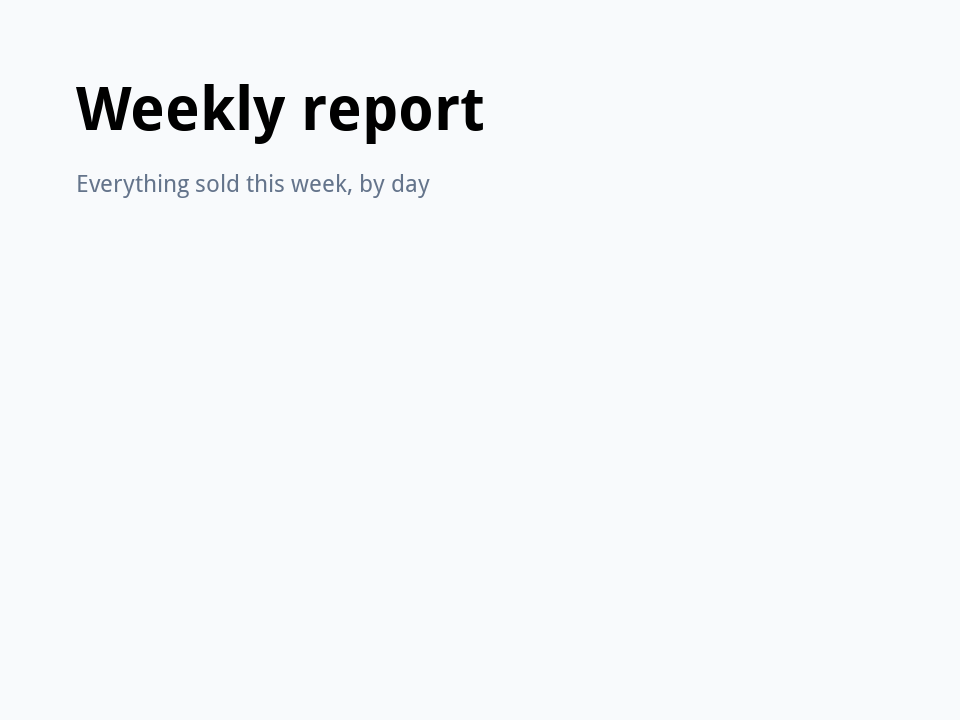
Those three properties are all that makes a field a label, and you can set them on any field: Lock text, Show border and Opaque in the Inspector's Basic section. With lockText true the user cannot type into the field, and a click on it sends mouseUp to it like a button's.
Columns with tabs
A tab character moves the text on to the next tab stop. Set a field's tabStops (the Inspector's Tab stops, in its Table section) and lines with tabs between their parts line up as a table. In a script, set the itemDelimiter to tab and each column is an item.
- On a new card, drag a Field to the top, make it nearly as wide as the card and about 90 points high, and name it
Table. In the Property Inspector's Table section set its Tab stops to150,300. - Drag a Standard Button under it and name it
Fill.
on mouseUp
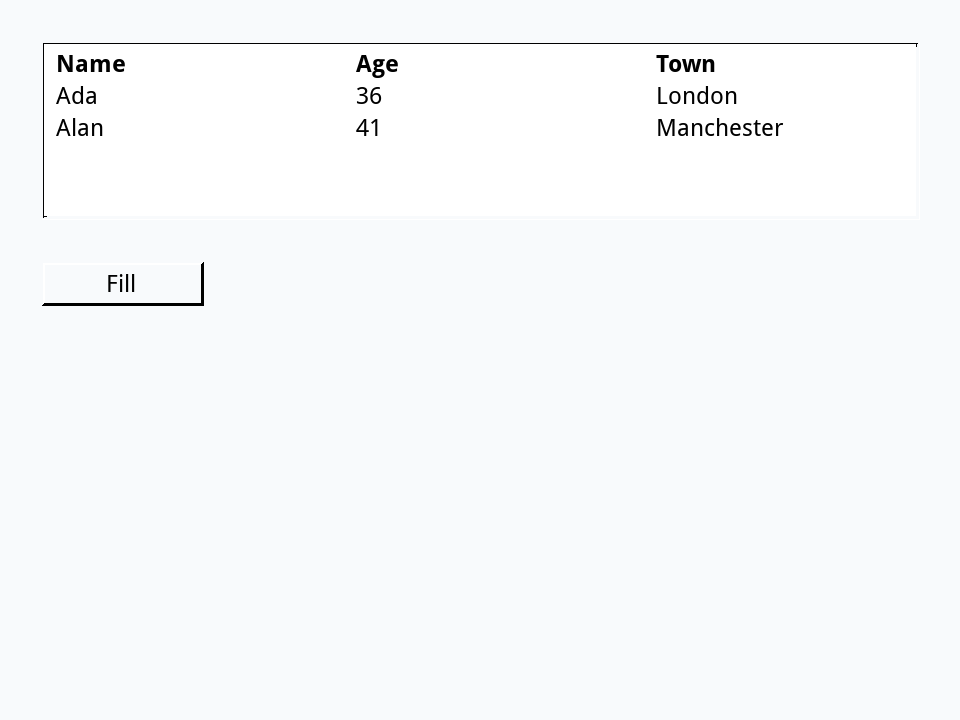
   put "Name" & tab & "Age" & tab & "Town" & return & \
         "Ada" & tab & "36" & tab & "London" & return & \
         "Alan" & tab & "41" & tab & "Manchester" into field "Table"
   set the textStyle of line 1 of field "Table" to "bold"
   set the itemDelimiter to tab
   put item 3 of line 3 of field "Table"
end mouseUpManchester
The backslashes join three lines of the script into one statement, as in Text and numbers. For bigger tables, with columns the user can sort and resize, drag a Data Grid from the palette: its own guide is in Help > Guides.
A list to choose from
A locked field whose listBehavior is true is a list: a click highlights a whole line. The palette's Scrolling List Field is one, with a scroll bar. the hilitedLine says which line is chosen (and setting it chooses one), and the selectedText gives its text.
- On a new card, drag a Scrolling List Field, make it about 200 points wide and 90 high, and name it
Fruit. - In the Property Inspector's Contents section, replace
Choice 1,Choice 2andChoice 3withApple,PearandPlum, a line each.
set the hilitedLine of field "Fruit" to 2
put the hilitedLine of field "Fruit"
put the selectedText of field "Fruit"2 Pear
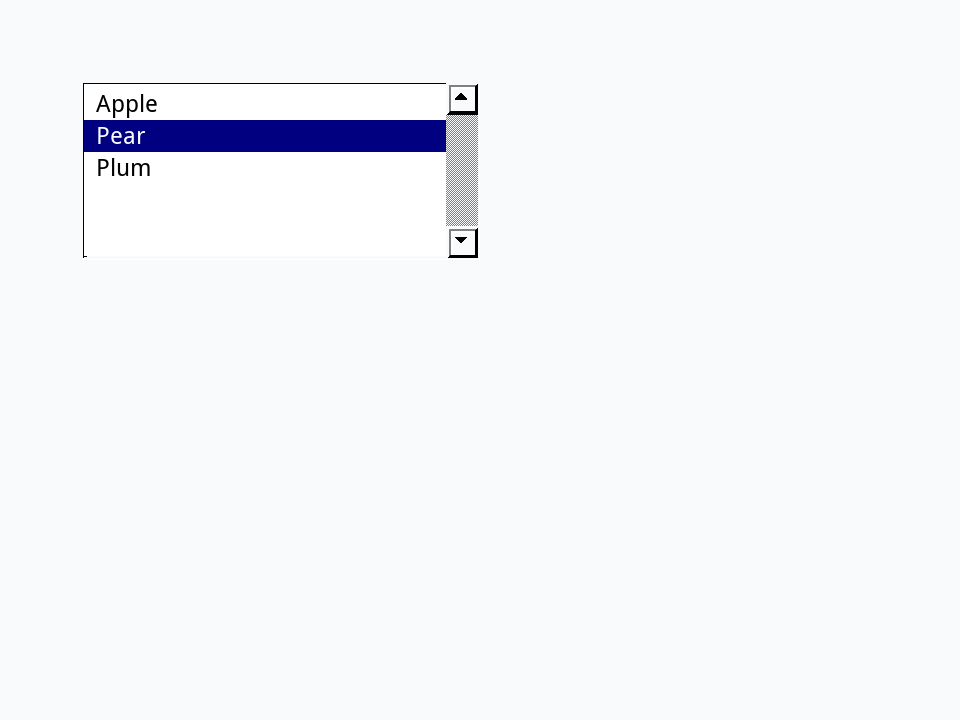
A list field sends mouseUp when a line is clicked, so its own script can read the selectedText of me and act on the choice. Give the list this script, and click a fruit in Run mode:
on mouseUp
   put "You chose" && the selectedText of me
end mouseUpset the hilitedLine of field "Fruit" to 3
send "mouseUp" to field "Fruit"You chose Plum
The Message Box lines do what a click on Plum does: choose the line, then send mouseUp.
Long text: scrolling
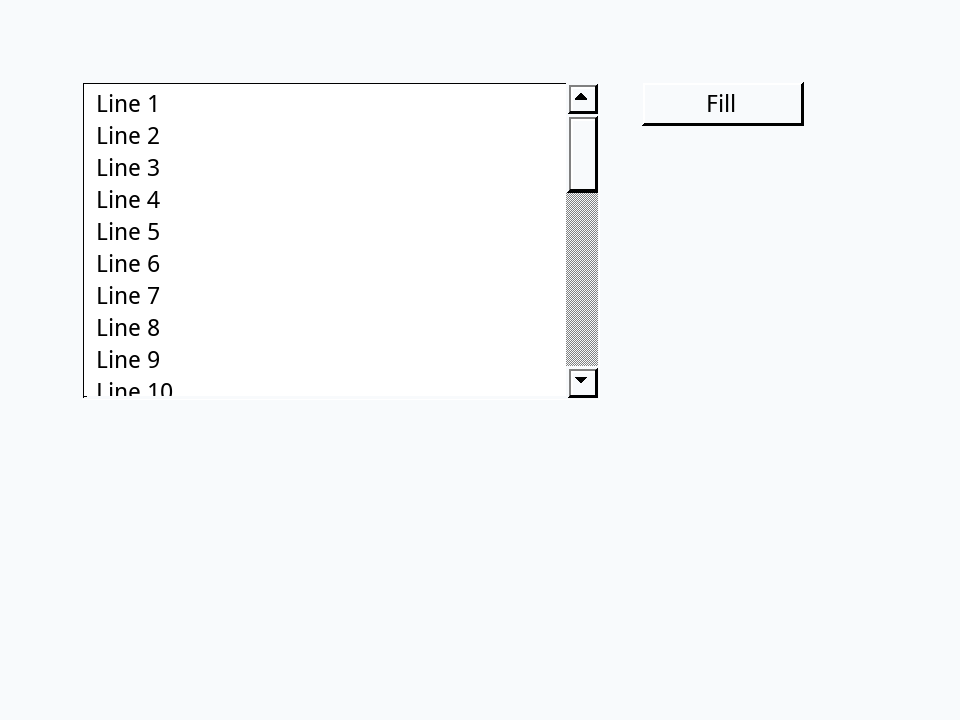
A field with more text than fits needs a scroll bar: the palette's Scrolling Field has one, and on any field you can turn on Vertical scrollbar in the Inspector (the vScrollbar property). Its scroll property is how far down it is scrolled, in points.
- On a new card, drag a Scrolling Field, make it about 260 points wide and 160 high, and name it
Long. - Drag a Standard Button beside it and name it
Fill.
on mouseUp
   repeat with i = 1 to 30
      put "Line" && i & return after tText
   end repeat
   put tText into field "Long"
   put the number of lines of field "Long"
end mouseUp30
Try it yourself
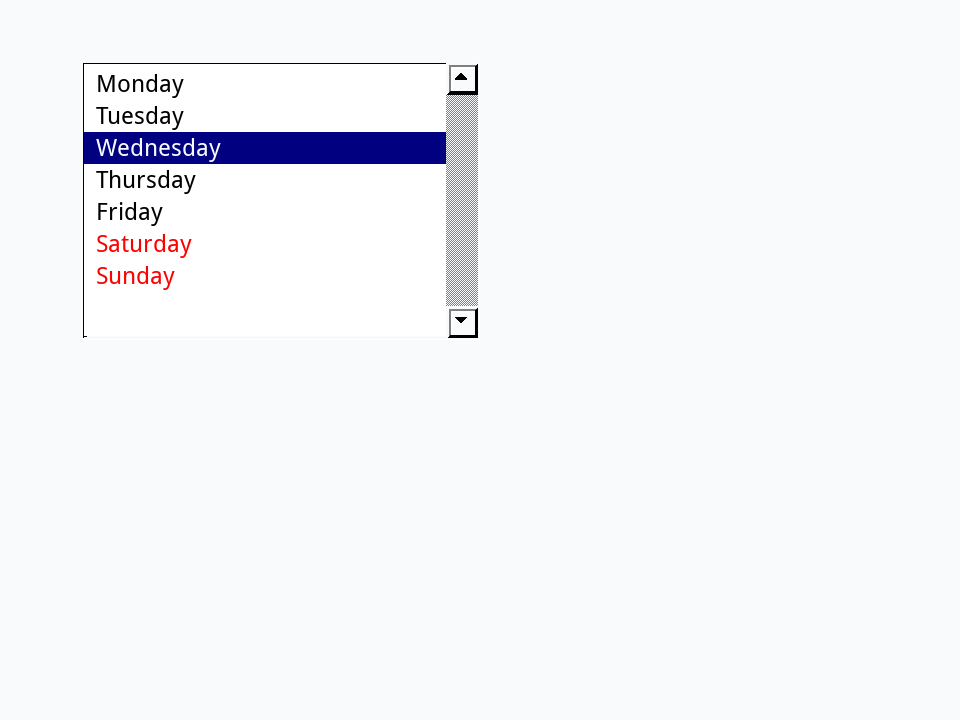
Make a list of the days of the week: drag a Scrolling List Field, name it Days, make it tall enough for seven lines, and type the days into its Contents, Monday first. Then, in the Message Box, choose Wednesday, make the weekend red, and put the chosen day.
- Drag a Scrolling List Field, about 200 points wide and 140 high, and name it
Days. - In its Contents, type the days of the week from Monday to Sunday, a line each.
Show a solution
set the textColor of line 6 to 7 of field "Days" to "red"
set the hilitedLine of field "Days" to 3
put the selectedText of field "Days"Wednesday
Words in this lesson
fieldtexthtmlTexttextStylelockTextlistBehaviorhilitedLineselectedTexttabStopsvScrollbarshowBorderLabel FieldScrolling FieldScrolling List FieldText menuEach one finds every lesson that uses it. The Dictionary has the whole story of each, with its syntax and more examples.